1st way to do it
To turn off the boot logo, Click Start > Run and type MSCONFIG. On the BOOT.IN
 I tab, check the box next to /NOGUIBOOT and click OK. The next time you reboot your computer, you'll see the BIOS screen and then nothing until Windows loads completely. The downside to this option is you won't get any feedback if your PC gets hung up somewhere in the boot process.
2nd way to do it
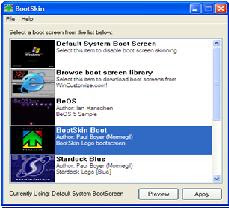
By replacing the boot image you can simply change the boot image with your desired one. The easy way to do this is to download a freeware app from WinCustomize called BootSkin. The utility automatically overrides the default Windows boot image with WinCustomize boot skin library.Download BootSkin.
3rd way:
1. Create a 215x147 .bmp file with 16 colors (NOT 16-bit) in any image editor. With your new image created, you need a freeware app called Resource Hacker to make some changes.
2. locate ntoskrnl.exe in your c:\Windows\system32 folder. Make a copy of the file called newntoskrnl.exe and leave the copy in the system32 folder. 3. Make a second copy of the ntoskrnl.exe on your desktop (this is the one you will edit).

4. Start Resource Hacker and open ntoskrnl.exe
5. Expand Bitmap > 5 and highlight the 1033 folder. Right-click the 1033 icon and choose Replace Resource.
Click the Open file with new bitmap button and locate the image you created earlier. Click the Replace button. Save and exit Resource Hacker.
6. Reboot into SafeMode and copy your newly created ntoskrnl.exe file into the Windows > system32 folder. !!!
No comments:
Post a Comment